Interior Geography and Story Cloth Workshop
A workshop review ~ Annie Webster

Making Maps Fabric stitched to paper with dye stuff, ready to fold, clamp, and place in simmering water.
In April 2023, I was thrilled to take part in Elizabeth Bunsen’s Interior Geography and Story Cloth Workshop at Studio Joy in Kansas City, MO. It was a fabulous workshop, Elizabeth is a wonderful teacher, and I am incredibly grateful to Missouri Fiber Artists for providing me with funding to attend this workshop. I would not have been able to attend this workshop without the scholarship, and I really feel I learned a lot both from a technical perspective and an artistic perspective.
So, what is interior geography? I would say it is a little vague. This quote is from the class description: “Is there an inner landscape of longing, imagining, referencing… a place of nurturance that orients you to that place? In what landscape do you feel most grounded?”
As we discussed interior geography, Elizabeth mentioned a blueprint-type sketch of a teenage bedroom (from MoFA member Amanda Jolley’s journals). This got me thinking about my grandparents' home, and how my cousin, my brother, and I used to run around their house. This was not an open concept home. There was a standalone wall that divided the kitchen from the living room, and we ran laps around that wall. This is what I had going through my head as we started our work: memories of Grandma and Pa’s house.
The workshop was a bit of a capstone course in that we brought together a variety of fiber techniques in our pieces. We incorporated hand stitching, eco printing, natural dyeing, rust dyeing, cyanotypes, silk/paper transfers, and indigo dyeing into our work. The weekend was about as fast-paced as these processes allow, but wasn’t hurried. While I was exhausted by the end of each day, it was “a good tired.”
We began the weekend making “maps” by stitching several varieties of fiber to paper to investigate how the different fabrics reacted to dyestuff. Most of the fabrics we used were straight from Dharma Trading fabric sample packs. I still can’t believe I had not thought to use those 4” x 4” samples in this way before. I also tucked some eucalyptus leaves, dried butterfly pea tea, and colored paper into my map. Our pieces were folded accordion-style, clamped between a couple of pieces of wood, and left to simmer for a couple of hours.

NaturalDyes: Dyeing with cochineal, butterfly pea tea, hibiscus, marigold, and red onion.
While our maps simmered away, we moved on to cyanotypes. In this workshop, we used Jacquard's two-part cyanotype set. I’ve used these chemicals before, but I’ve always dried my fabric in the dark after applying the chemicals. Here, we simply painted the solution on our fabrics and papers, put our flowers and whatnot on top, clamped everything under a piece of plexiglass, and took them outside. And we had beautiful cyanotypes!
We also did a bit of natural dyeing at this point, again using some of those Dharma Trading Company fabric samples. Elizabeth does something she calls “tea cup dyeing” where she dyes very small quantities of fabric in tea cups (we had quite a few people in our class, so we used mason jars). She made little sachets of dye stuff with “a pinch” or “a little bit” of mordant included. As someone who has pages and pages of notes with percentages of dyestuff and mordant compared to weight of fiber recorded from my dyeing experiments, this was a little challenging for me, but we achieved lovely results.

Maps out of the dye pot, hanging to dry.
I think the best part of the workshop was gathering around a table and watching everyone unfurl their pieces from the pot. We unveiled our maps after lunch on day one. Everyone created beautiful colors and prints. We all had pretty much the same materials to work with, but all came up with such different results. I think there was an overall nervous feeling for each reveal. I feel like everyone thought, “oh sure, that one turned out amazing, but mine is just going to be mud,” and yet, each map was more beautiful than the last.
We also stitched our first story cloth on the first day. The idea is the same as the map, small pieces of cloth are stitched onto a larger base fabric, colored papers/silks, flowers, and/or rusty bits are added, and the piece is folded up, clamped, and simmered in a pot for a couple of hours. In addition to the sample fabrics Elizabeth provided, we each brought some fabrics from our stash.
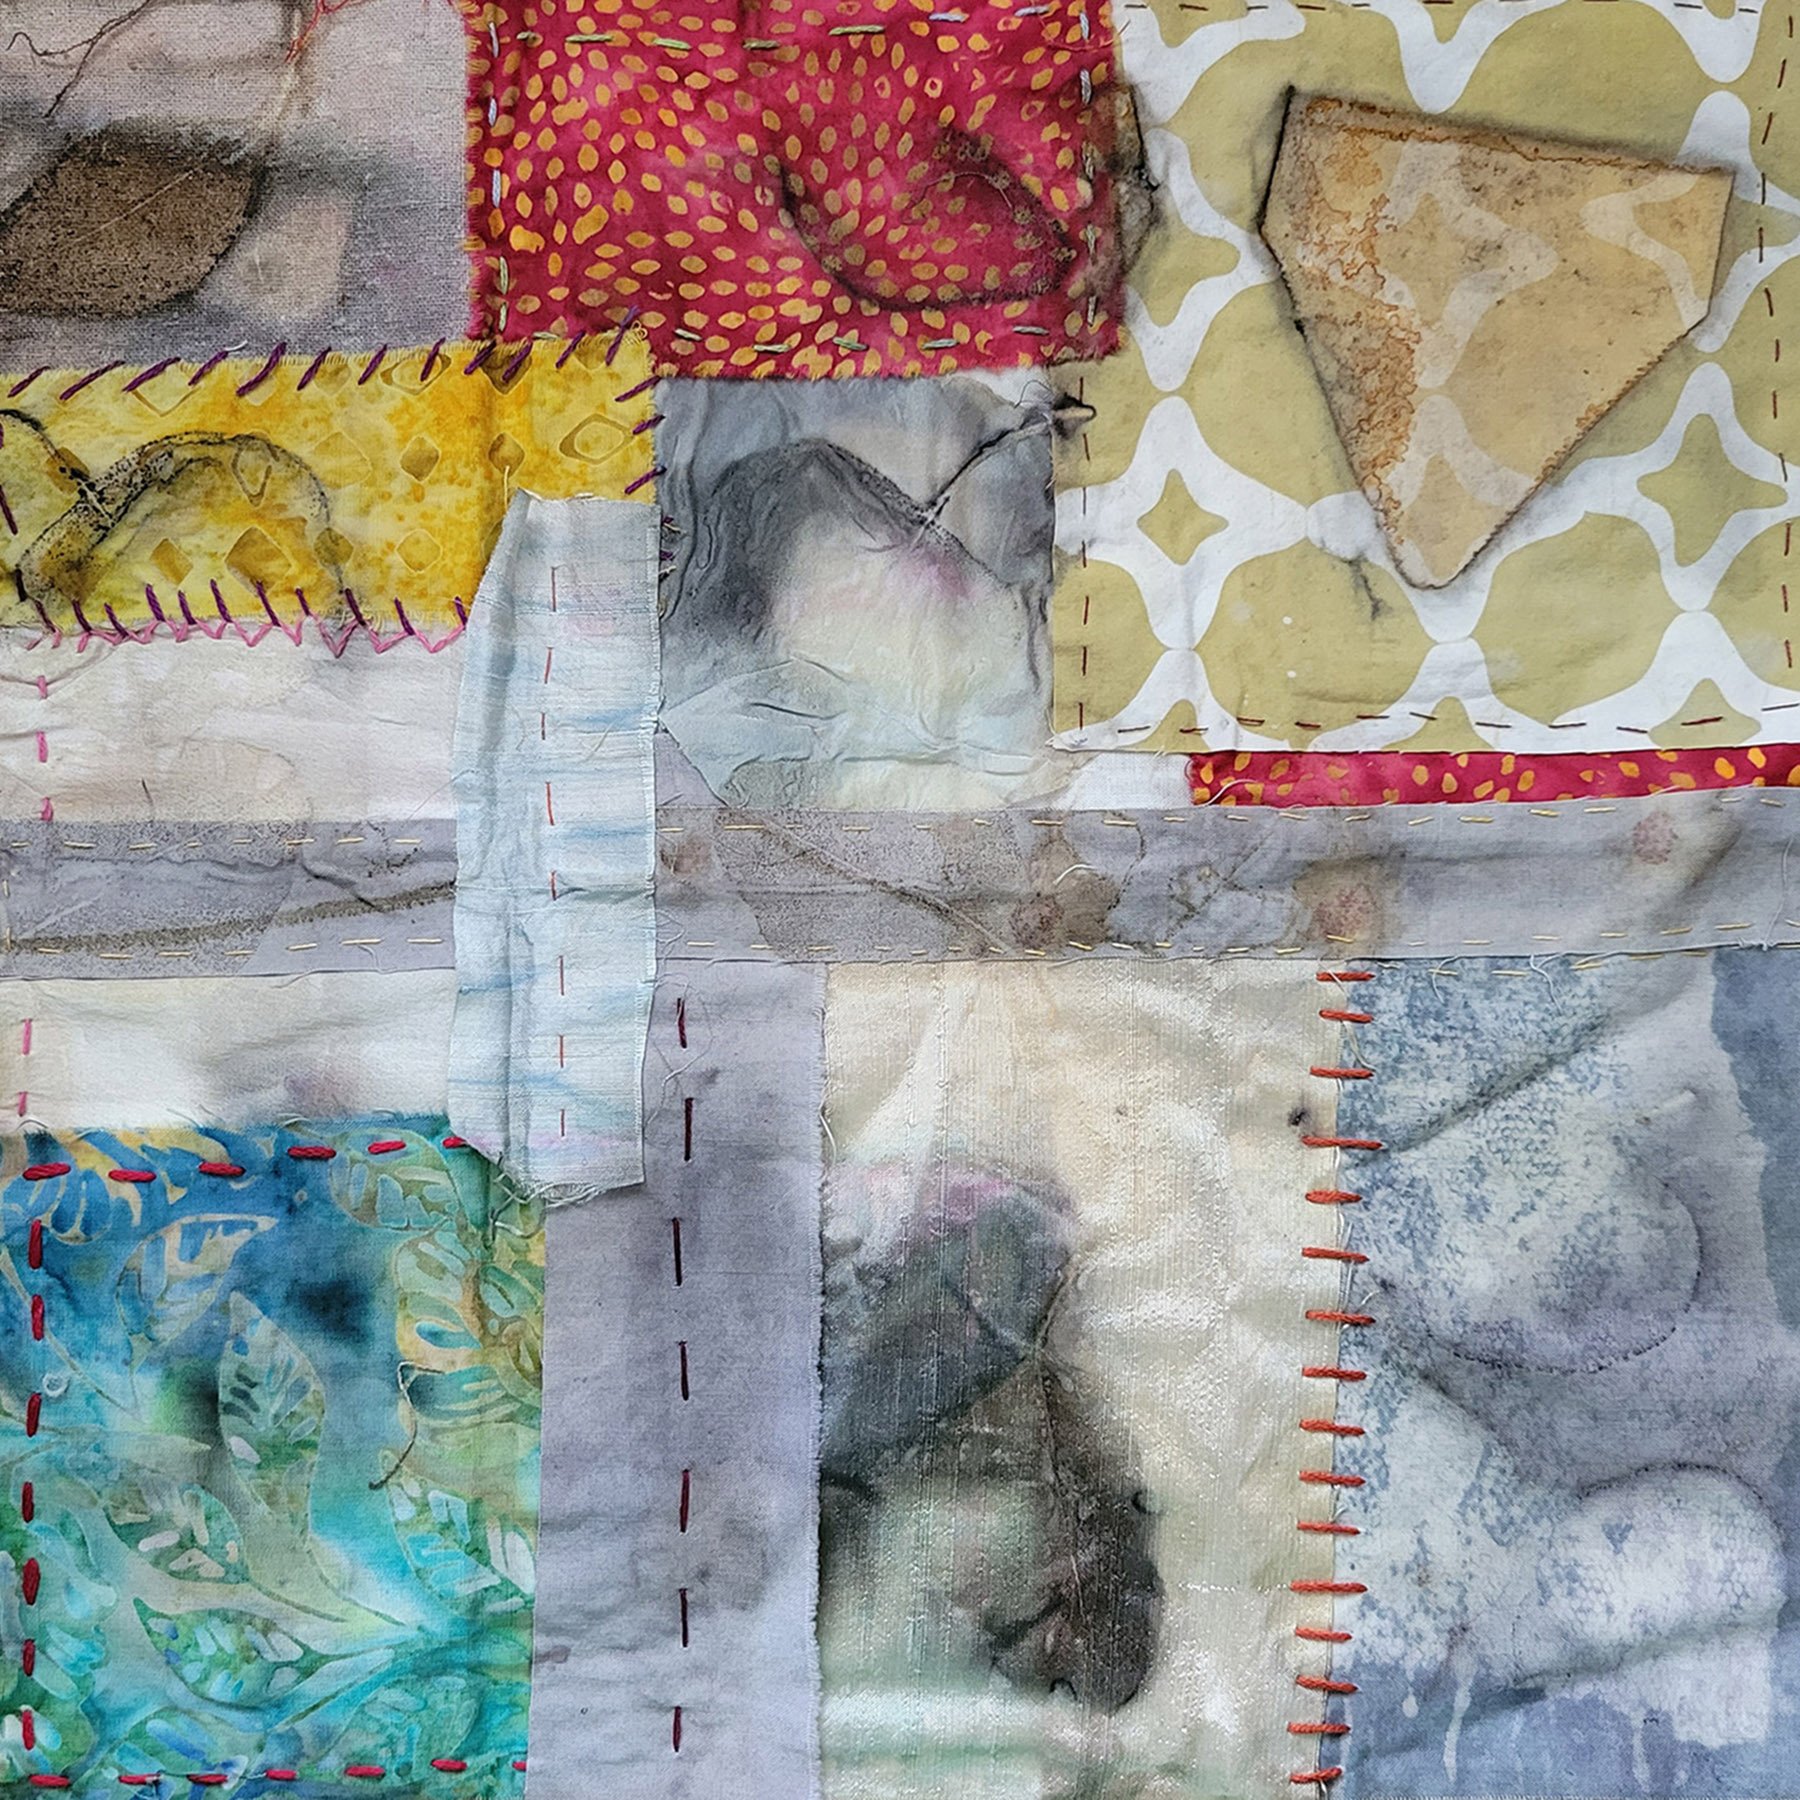
My first story cloth: Many fabrics, a little rust, and a little eucalyptus.
The next two days of the workshop included further exploration of cyanotypes, eco-printing, natural dyeing, and stitching. I grabbed handfuls of “stuff” from my yard to use for cyanotypes on my way to class Saturday, including some strawberry leaves. I still had Grandma and Pa’s house floating around in the back of my head as I was doing my work, and picking strawberries with my grandma is a very early memory for me. She also made me a dress when I was around 7 or 8 (using a pattern in the style of the red “Annie” dress from the movie, because I LOVED Annie). She used a navy fabric dotted with little red strawberries and white blossoms. I knew I wanted to incorporate strawberries into my final piece, and I loved the way this cyanotype turned out.
I finally got around to using the indigo vat about midway through the second day. It was fairly weak by the time I got to it, which was initially disappointing to me. However, the more I looked at this cloth, the more it reminded me of Pa’s faded chambray work shirts. I also included a few little rusty bits into my indigo dyed piece, which reminds me of all of the rusty tools Pa had in the Morton building. I decided to use this indigo dyed handkerchief as the base for my second story cloth. I knew it would likely not be visible in my final piece, but knowing it would be there was a comfort.
And here is where I veered away from the class a bit. Instead of adding bits of cloth to this indigo dyed background to then go back into the dye pot to create the next story cloth, I opted to just stack a whole bunch of pieces of cloth together with some eucalyptus and colored paper bits to create a bundle for the pot. I would then use these bits to piece together my “Grandma and Pa’s” story cloth. This was me sneaking in a little bit more control over my piece, I think. Is this good or bad? I think that is open for debate. Relinquishing control is inherent in natural dyeing and printing processes—plants are gonna do what they’re gonna do. I already had some precious little bits, and I knew I would be devastated if they got junked up in the dye pot. Plus, the desire to control things is, in fact, part of my story, so it makes sense that it would come through on my story cloth (justifying things–also part of my story, apparently).
My final set of eco prints were a luscious collection of orange eucalyptus on somewhat darkened wool fiber. One of my fellow students (MoFA member Julie Pishny) placed a piece of iron in the bath with her bundles, and it saddened (darkened) the pieces in the bath beautifully.
I dyed, printed, and stitched all day on Saturday, and left my station a mess overnight. Sunday morning, I tried to tidy up a bit and figure out what I had to work with, and what I might need. I brought a couple of pieces with me from my grandma’s beauty shop to try and incorporate into my piece. I spent all of Sunday stitching, except for making a few more cyanotypes, because those are fun. At the end of Sunday’s class, we all laid all of our work out for everyone to look at. Everyone created such beautiful pieces! All were very personal, some sad, and some happy.

“Grandma and Pa’s” at the end of the workshop. Still a lot of stitching to do!
When I left the class, I had my general layout finished and everything more or less stitched down. I used the tea cup dyed swatches starting in the upper left corner. There’s marigold, cochineal, hibiscus, and butterfly pea tea. The soft colors of these fabrics reminded me of the Fun Dip candy that we used to get when Pa would take us to the dime store to buy candy. Truly nasty and messy candy, so perfect for kids. I stitched in some ovals on those swatches to represent the laps we ran in the house. I tucked a keychain from my grandma’s beauty shop behind the violet leaf cyanotype that looks like a heart. My strawberry cyanotype is down in the lower left corner, with a lot of little seed stitches added. I filled in with some of the other little pieces I had made over the weekend. The patchy, scrappy quality of it is very in keeping with the general “grandma-ness” of the piece, from her quilts, to her piles and piles and fabric in the closet. There was still much more stitching to do!

“Grandma and Pa’s” ~ Annie Webster
And then…I moved on to the next thing. There were other pieces to finish, meetings to go to, and trips to take. My story cloth rested for months while I occasionally pondered what my next steps would be. I have several of my grandma’s handwritten recipes, and I wanted to incorporate her handwriting into the piece somewhere. I also just wanted to stitch. So that’s what I did. By late fall, I had finished.
The layout didn’t change, but there is so much more stitching in the finished piece. The keychain remains nestled behind the violet leaf cyanotype, and I worked in some “grandma writing.”

Keychain from the Countryside Beauty Shop stitched into a heart-shaped, violet leaf pouch.
This workshop forced me to create a more personal piece than I usually make. Honestly, I often make things to distract my brain from thinking about bigger, deeper things. This piece is made of happy memories, but there is sadness in it, too. My grandparents aren’t here anymore–neither are my dad or uncle, who were also there for those happy times. And that young Annie with not a care in the world, picking strawberries and running around the house with sticky candy fingers is, if not gone completely, sometimes pretty far away as the realities of adulthood have taken over. Those are the feelings that made the piece hard to complete, and then hard to write about for months.

A stew recipe from my grandma, with her distinctive cursive “O” in “Onions.”
Again, I am so thankful to MoFA for allowing me to participate in this workshop through the scholarship. If there is a workshop you have been eyeing, but seems out of reach, I encourage you to apply! ~ Annie Webster